The strengths of the Kolab Calendar: Part 1
At Kolab Now we love the feedback that we get from our users. It gives us a picture of what we do right, and where we need to improve. We hear which features users love and which they don’t. And that is how we learned, that one of the most valued and most used Kolab features is the calendar.
Why is that, and what things are so great about it? We decided to share our experiences with a few great calendar features in this series of posts. This first part will discuss the calendar in general, colorized events, calendar lists, and scheduling & editing of events.
To use the calendar the ‘Groupware features’ needs to be enabled in the subscription. Login to'https://kolabnow.com/users/', select your user, and scroll down to the subscriptions. Check the Groupware features box, and remember to press ‘Submit’ in the bottom of the page.
When the groupware features subscription is enabled, the calendar is found in the web client 'https://kolabnow.com/apps'. The calendar symbol gives access to the personal and shared calendar and scheduling features.
The central part of the screen displays the schedule with events from the active calendars matching the current date range. The active date range is displayed above the calendar in the toolbar area, and can be moved forward and backward in time using the navigation arrow buttons in the top right corner.
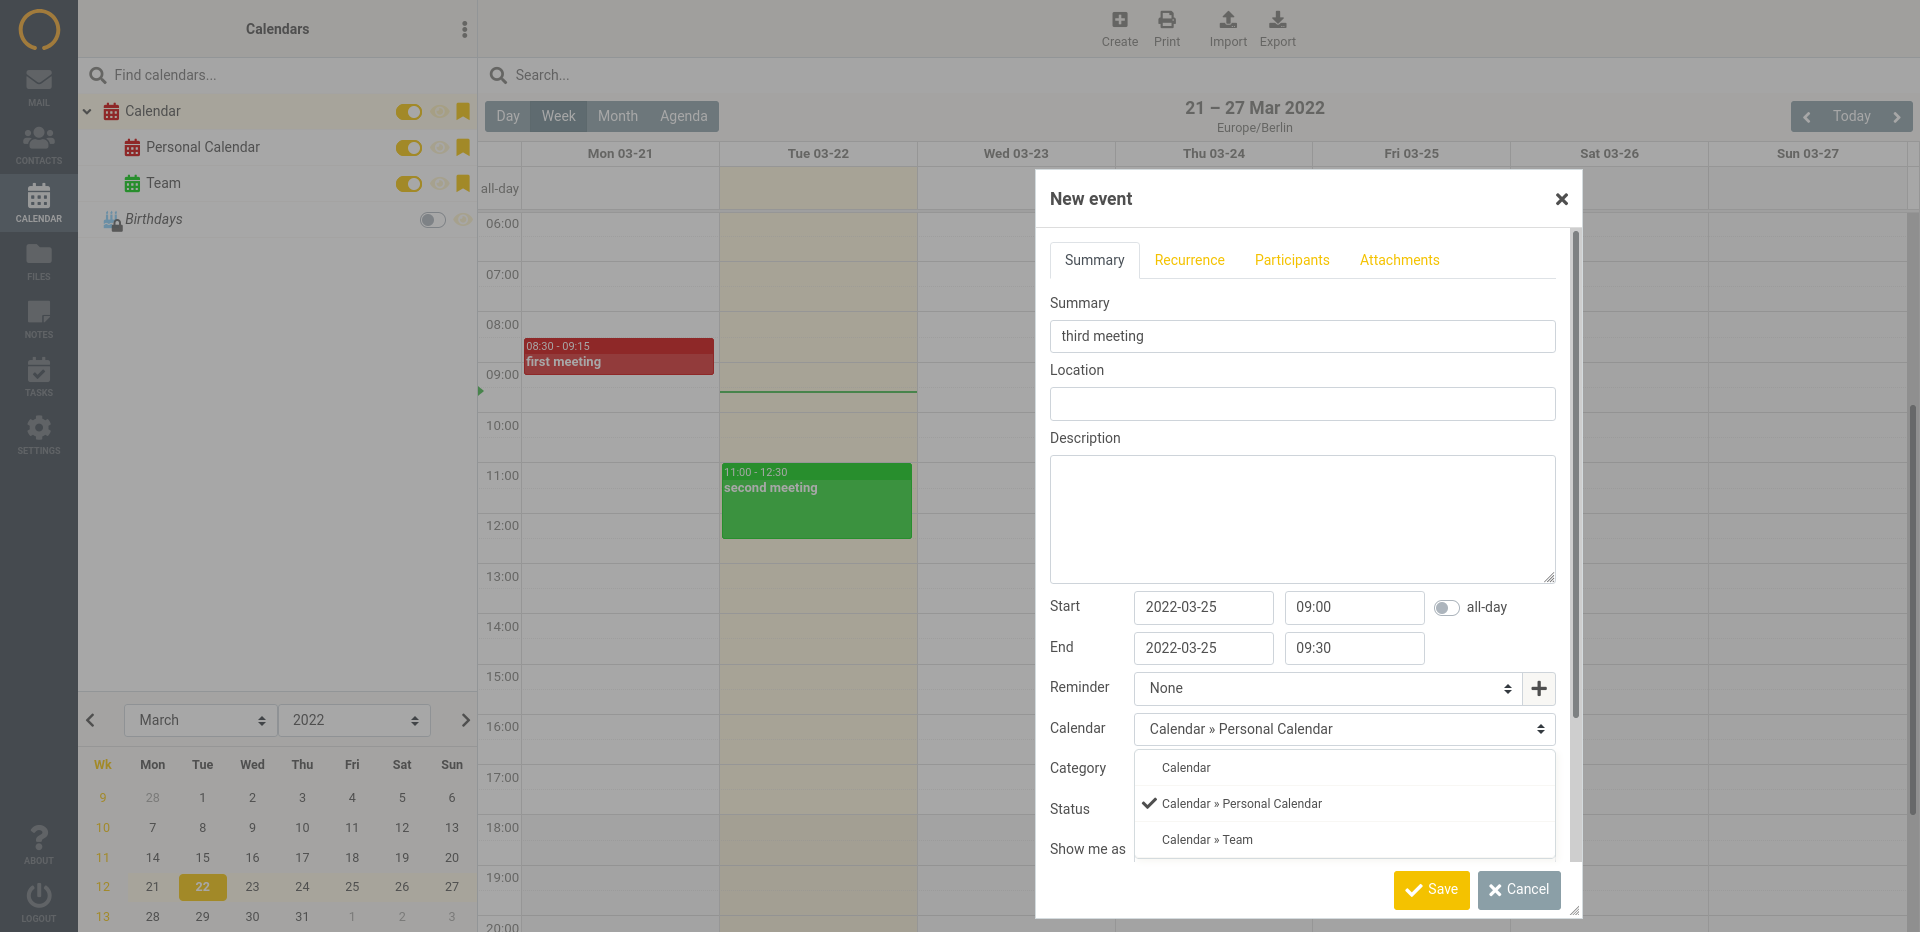
Usually a calendar is full of different event boxes. A click on such an event box opens a dialog displaying all details of the event. What users like here is the ease of scheduling and editing. The event dialog is easy to handle, recurrences can be set and participants can be added.
Once in a while one wants to have separate calendars for different purposes; ‘Office’, ‘Private’, ‘Travel’, You name it. This way different groups of activities can be grouped together by colors.
|
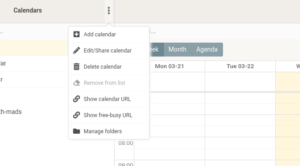 |
The new calendar will show up on the left.
(Removing a calendar is as easy as creating it – Select ‘Delete calendar’ from the same drop down menu)
With more calendars available it is time to start creating events. This can be done via the ‘+’ button in the top menu, or it can be done by simply pointing at the correct time in the schema and click the mouse. This opens a fresh and empty dialog box. Enter summary, date/time, reminders, participants etc in the dialog, and remember to press ‘Save’ to create the event. All-day events can also be added by clicking the day above the time blocks in the calendar view.
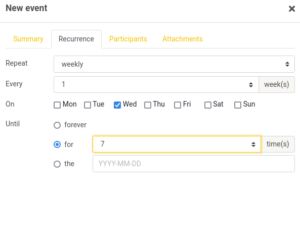
I want to leave a few words here about recurrence (periodically recurring event series, how an event is repeated over time) of events as some users have asked questions in this context. When the ‘Recurrence’ tab is selected, the options are presented as soon as the ‘Repeat’ interval is selected:
 |
|
As mentioned in the section above, events in the Kolab calendar have a color assigned which is used to group events in a calendar by color. Options for how to use the colors can be set in the 3 dot menu. More advanced settings are available at ‘Settings -> Preferences -> Calendar’, where types of events and how to color the frame of the events in those are configurable.
Another strength is the ability to have different calendars listed under each other on the left hand side while one can see all events from the different calendars in one view. One can use the check boxes in that list (to the left) to show or hide specific calendars in the main view. Beside the personal calendar, the list also displays calendars shared by other users or ones that are shared among your family/friends/colleagues. Small icons in the list give a hint about the origin and some of them are maybe read-only (marked with a small padlock icon).
To summarize today’s session these are some of the main advantages our Calendar is offering:
- Clearness: Especially in the web-client things are very lucid and transparent
- Ease-of use: Create and edit calendars & events without problems