The strengths of the Kolab calendar: part 2
Hello again everyone. Last weeks part 1 of the strengths of the Kolab calendar coped with the calendar in general, colorized events, calendar lists, and scheduling & editing of events.
Today the journey continues and we will dive deeper in the scheduling & editing of events and cover topics like event invitations & notifications – and sharing of calendars and subscribing to them.
An important part of managing your schedule is to invite others to events – in Kolab you can manage the participants in the ‘edit dialog’ of the event.
How to invite others?
If you need to setup a meeting, a birthday party, or a weekend away from the kids, and you want to track who is attending and who is not, the calendar assists with sending out invitations and see responses. When creating a new event you can switch to the ‘participants’ tab (you are already listed as the organizer of the event).
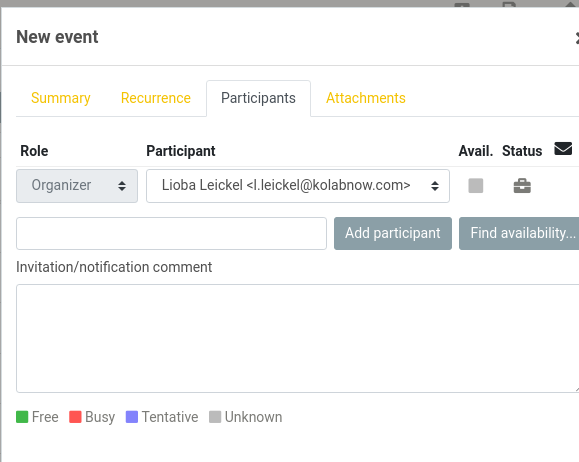
Enter the name or the e-mail address of the person to invite. Contacts from the address book(s) are suggested as you type. To add a participant to the list click ‘add participant’ and select the role for that person (e.g. required or optional). You can add as many participants as needed following this procedure. When saving the event, invitations will be send out to all participants.
Now that event invitations have been sent out to participants, let us have a closer look at the event invitations and notifications.
When receiving an event invitation the participants can accept or decline the event right away. This action will send an automated response to the event organizer and update the calendar of the participant. The system will display a yellow box in the preview pane or email view.

As an organizer who has invited others to an event, you will receive responses to the automatically send invitations when the attendees either accept or decline them. The [Update the participants status] button will update the original event in the calendar with the RSVP status from the participant. Looking at the event details in the calendar view the status icons next to each participant displays the new status.
Good to know: When creating events in different time zones, time differences will as default be adjusted automatically by the system.
Now we move to the maybe most valuable feature of our calendar, the sharing. Especially for a smooth collaboration within your group, sharing calendars is essential.
Good to know: Calendars can only be shared between users in the same domain as the owner of the calendar. e.g. joe@example.org can share calendars with jenna@example.org and jack@example.org, but NOT with jack@otherdomain.org or james@kolab.org.
When entering the calendar section and navigating to the calendar settings dialog (the three dots next to the calendars) one can select to Edit/Share a calendar.
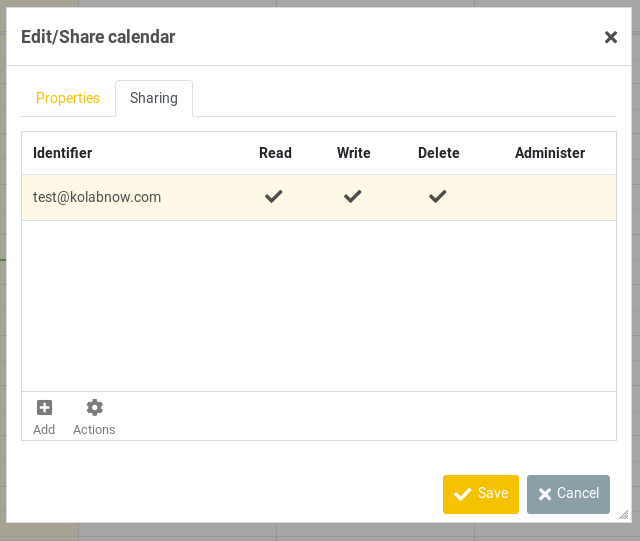
Choosing the ‘sharing’ tap at the top of the dialog box a table will display the permissions already given to see and modify the calendar. In case the calendar needs to be shared with a new user, please follow these steps:
- Click the ‘add entry’ button (+) in the table footer
- Enter the username or chose one from the auto-completion menu that appears when you start typing. instead of a specific user, permissions can be granted for
all usersorguests. - Select the access right you want to grant for the user
- Click ‘save’ to add the new permission
If you want to edit the permission you can choose ‘edit’ from the actions tab or simply double click the entry.
For removing existing permissions, select the according entry in the list and then choose ‘delete’ from the menu behind the gear icon in the footer of the list.
Calendars shared by others are not showing up right away in the list within the calendar view. Switch to ‘settings -> folders’ to see all resources that can be accessed. The handy thing: we have a shortcut for this. Simply open the calendar settings dialog again and choose ‘manage folder’. In order to make a shared calendar appear in the calendars list, select the calendar in the folder manager and check the ‘subscribed’ mark in the list. Only subscribed calendars are visible in the calendar view.